このコンピュータで1つ以上のネットワークプロトコルが欠落しているのは、ネットワーク接続に必要なWindows Socketsレジストリエントリが原因で発生するエラーです。これらのエントリがない場合」は、Windowsネットワーク診断によって報告されたこのエラーをトリガーします。システムがインターネットへの接続に失敗し、[診断]ボタンをクリックすると表示されます。宛先アドレスに対してpingを実行できる場合がありますが、ブラウザーは同じことを行えません。ほとんどの場合、Winsockとも呼ばれるWindows Sockets APIの不整合がこの問題の根本的な原因です。
着信と発信の両方のプログラムのネットワーク要求を担当します。この問題はインターネットプロバイダーにも原因がありますが、同じISPに接続されている他のデバイスでインターネットが機能している場合、ISPは問題なく、トラブルシューティングの手順を続行できます。

1つ以上のネットワークプロトコルを修正する方法が見つからない
このガイドは、Windowsのすべてのバージョンと互換性があります。
方法1:不足しているプロトコルファイルを復元する
クリックして破損したファイルをスキャンするRestoroをダウンロードして実行し、ここで修理それら、それはファイルが壊れていることを発見した場合、。
方法2:IPv6を無効にする
IPv6を無効にする手順はこちらをご覧ください
方法3:Winsockをリセットする
Winsockの破損は、このようなエラーを引き起こすことが知られています。ほとんどの場合、Winsockをリセットすることで問題は解決します。Winsockをリセットするには、次の手順に従います。
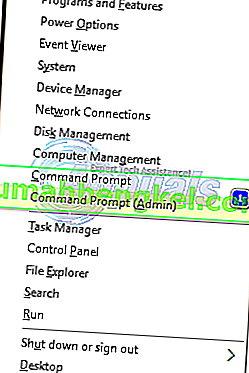
- 押してWindowsキー。検索ボックスに「cmd」と入力します。表示された結果のリストから; cmdを右クリックし、[ 管理者として実行 ]をクリックします。Windows 8または10を使用している場合は、Windowsキーを押しながらXキーを押します。[コマンドプロンプト(管理者)]を選択してクリックします。
- 黒いコマンドプロンプトウィンドウで「netsh winsock reset」と入力し、Enterキーを押します。


システムを再起動し、問題のチェックを解決します。
方法4:ネットワークアダプターを再起動します
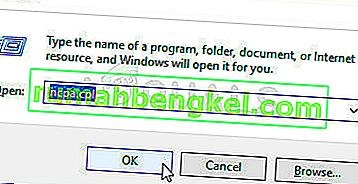
ネットワークアダプターの一時的な不具合により、ネットワークアダプターがプロトコルを取得できない場合があります。単純な再起動でも問題が解決する場合があります。これをする; ホールドWindowsキーとRキーを押しを。実行ダイアログで「ncpa.cpl」と入力し、[OK ]をクリックします。

ネットワークアダプターのリストが表示されます。どれが自分のものかわからない場合は、リストされているすべてのアダプターで以下の手順を繰り返すことができます。それ以外の場合は、接続に使用しているアダプターで実行します。
ネットワークアダプターを右クリックし、[ 無効にする ]を選択します。次に、もう一度右クリックして、[ 有効にする]を選択します。

方法5:コンポーネントをリセットする
このソリューションでは、ネットワーク接続に関連するコンポーネントをリセットして更新します。
テキストファイルを作成し、次のコードを含むfixnetwork.batとして保存します。
ipconfig / flushdns ipconfig / registerdns ipconfig / release ipconfig / renew netsh winsock reset catalog netsh int ipv4 reset reset.log netsh int ipv6 reset reset.log pause shutdown / r
(上記のコマンドを使用して)ダウンロードしたファイルまたは作成したbatファイルを右クリックし、[ 管理者として実行 ]をクリックします。探してくださいアクセス拒否、メッセージあなたが任意の通知を行う場合には、再起動に、黒い画面に言うとき、その後、他のヒットは、以下の手順のいずれかのキーを進めます。再起動後、TEST。

レジストリの手順を実行する前にレジストリバックアップを作成するためにインポートされます。これを行うには、左上のペインから[ ファイル ] -> [ エクスポート(コンピューターを使用)]をクリックし、エクスポート(コンピューターのどこかに保存)します。これは、レジストリの変更が関係するすべての方法で実行する必要があります。
アクセス許可を変更するには、次のレジストリキーを編集します。
これを行うには、Windowsキーを押しながらRを押します。タイプregeditとで、実行ダイアログを押してください。レジストリエディタウィンドウが開きます。
ホールドのCTRLキーとキーを押しFを。[ 検索する文字列 ]ボックスに次の値を入力し、[ 次を検索 ] をクリックします。
キーが検索されるのを待ち、一度検索したら、このキーを展開して26というフォルダーを探します
eb004a00-9b1a-11d4-9123-0050047759bc

キーへのフルパスは
H KEY_LOCAL_MACHINE / SYSTEM / CurrentControlSet / Control / Nsi / {eb004a00-9b1a-11d4-9123-0050047759bc} / 26 。26を右クリックし、[ 権限 ]をクリックします。

追加ボタンをクリックします。テキストボックスに全員を入力して[ OK]を押します。全員がすでにそこにいる場合は、フルアクセスを許可します。OKをクリックします。ダウンロードしたファイルを管理者として実行します。

方法6:TCP / IPを再インストールする
TCP / IPは、インターネットへの接続方法を定義する一連のプロトコルです。それらに不一致があると、インターネットアクセスがすぐにブロックされます。ホールドWindowsキーとRキーを押しを。入力ncpa.cplと入力し、クリックして、[OK]
アクティブな接続が何であれ、有線接続または無線接続のいずれかがあり、それを右クリックして[ プロパティ ]を選択します。

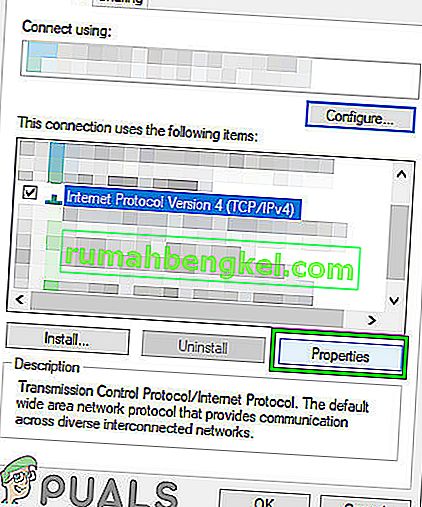
下では、このコンポーネントは次の項目を使用し、クリックしインストールボタンをクリックします。[ プロトコル ]をクリックし、[ 追加 ]ボタンをクリックします。

クリックしてしているディスクのボタンを。[ 製造元のファイルのコピー元]ボックスにC:\ windows \ infと入力し、[OK]をクリックします。

Under the Network Protocol list, click Internet Protocol (TCP/IP) and then click OK.

If you get the This program is blocked by group policy error, then there is one other registry entry to add to allow this install. Hold Windows key and press R.

Type regedit and press Enter.
In the Registry Windows, navigate to HKEY_LOCAL_MACHINE\SOFTWARE\Policies\Microsoft\Windows\safer\codeidentifiers\0\Paths
Right click on paths in the left pane and click Delete. Now repeat the above process to reinstall TCP/IP.
Close all windows, and restart your system. Your problem should be gone now. If not, move on to the next solution. This method does not apply to home based versions of windows.
Method 7: Uninstall and Reinstall Your Security/Antivirus Software
If you have recently installed any Internet Security Software, it may be blocking your access to the internet. Temporarily disable it to check if that’s what causing the problem. Quicket way is to just uninstall it, reboot the PC and then test – if system works without it, then re-install another AntiVirus. Hold the Windows key and press R. In the run dialog type appwiz.cpl and click OK. In the programs list, find your security software and right click on it. Click Uninstall. Follow the onscreen instructions to remove it and restart your system.
Method 8: Powerline Adapters
If you are using a Powerline Adapter, then it can interfere with your network. A reset can solve most of these problems. Refer to the instructions manual for the adapter to reset your Powerline Adapter.
Method 9: Disable Proxy
Go to Settings -> Network -> Proxy -> Manual Proxy Settings and turn it off.
Method 10: Change your internet router’s Wireless Mode to 802.11g
Many people have had luck with fixing this issue by changing their wireless router’s Wireless Mode to 802.11g instead of 802.11b+g+n. By default, almost all wireless routers are set to the 802.11b+g+nWireless Mode out of the box. In order to change your internet router’s Wireless Mode to 802.11g, you need to:
Login to your wireless router’s administration and settings panel through a browser of your choice. Instructions for accessing your wireless router’s administration and settings panel will be found on the user manual that came with your wireless router.
Scour everything under the Wireless category for a setting by the name of Wireless Mode or Mode.
Set your wireless router’s Mode/Wireless Mode to 11g or 11g – whichever applies in your case.
Save the changes and exit your wireless router’s administration and settings panel.
Restart both your wireless router and your computer.
Check to see whether or not the issue has been fixed once your computer boots up.
Method 11: Hard reset your wireless router
If none of the methods listed and described above have worked for you, there is still one more thing that you can try, and that is to hard reset your wireless router. Hard resetting your internet router will cause all of its settings and preferences to revert to their default values, and that, in many cases, has been able to fix this issue and restore internet access. In order to hard reset your wireless router, you need to:
Get your hands on a paperclip or a pin or any other pointy object.
Locate the recessed Reset button on your router. This button is basically a tiny hole normally located at the back of a router with the term Reset written above or below it.
Put the pointy end of the pointy object you acquired into the Reset button and push it all the way in. Press and hold the button for a good few seconds. This will successfully reset your router.
Once the router has been reset, restart it and then start reconfiguring it.
Method 12: Install Protocol
It is possible that the right protocol hasn’t been installed for internet settings. Therefore, in this step, we will be installing the correct protocol for the computer. For that:
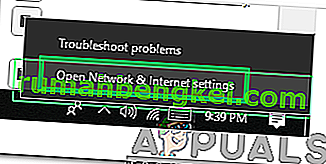
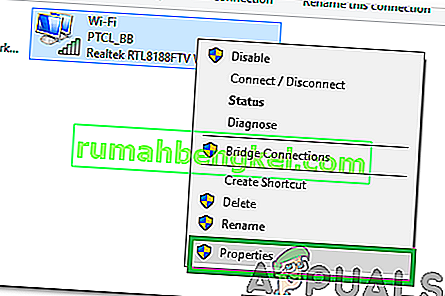
- Right–click on the “Wifi” icon in the system tray and select “Network and Internet Settings“.
- Click on the “Wifi” option in the left pane if you are using wifi and “Ethernet” option if you are using an ethernetconnection.
- Click on the “Change Adapteroptions” option.
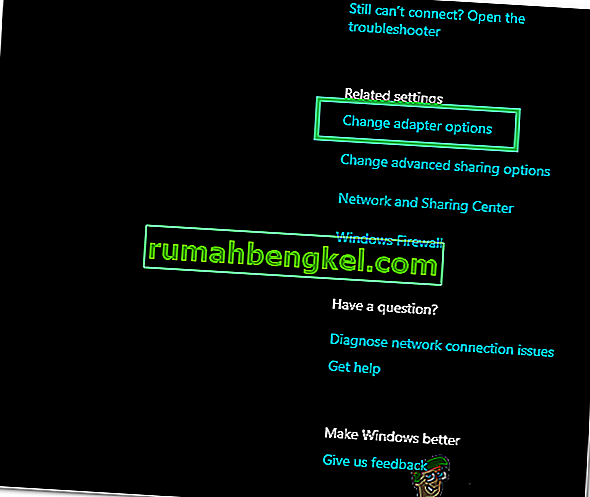
- Right-click on the connection you are using and select “Properties“.
- Click on the “Client for Microsoft Networks” option and select “Install“.
- Select the “Reliable Multicast Protocol” option and select install.
- ウィンドウを閉じて、問題が解決するかどうかを確認します。


方法13:自動設定を使用する
PCが特定のDNSアドレスを使用するように構成されている可能性がありますが、ネットワークアダプターに正しいネットワーク構成が提供されていません。したがって、このステップでは、自動設定を使用してこの問題を修正します。そのため:
- 押しの「Windows」と「R」のボタンとタイプ「ncpa.cplと入力」。
- インターネット接続を右クリックして、[ プロパティ ]を選択します。
- 「IPV4」オプションをダブルクリックし、「DNSサーバーのアドレスを自動的に取得する」にチェックを入れます。
- [ OK]をクリックして、問題が解決するかどうかを確認します。