ユーザーは通常、Windows Update(WU)を介してWindows 10を更新しようとした後にこの問題が発生します。エラー0x8024a105自動更新コンポーネントの問題を示します。通常、更新が失敗した後、ユーザーには次のメッセージが表示されます。
「一部のアップデートのダウンロード中に問題が発生しましたが、後で再試行します。これが繰り返し表示される場合は、Webを検索するか、サポートに問い合わせてください。このエラーコードは役立つかもしれません:(0x8024a105)。」

現在この問題に苦労している場合は、ユーザーと同様の状況でユーザーを支援するために実行可能ないくつかの修正を特定しました。問題を解決する解決策が見つかるまで、以下の方法を順番に実行してください。
方法1:Windows Updateトラブルシューティングツールを実行する
Windows Updateトラブルシューティングツールを実行して、簡単に始めましょう。一部のユーザーは、組み込みのトラブルシューティングツールが壊れたコンポーネントを自動的に修正できるようにすることで、更新が正常に行われるようにしました。Windows Updateトラブルシューティングツールの実行方法に関するクイックガイドを次に示します。
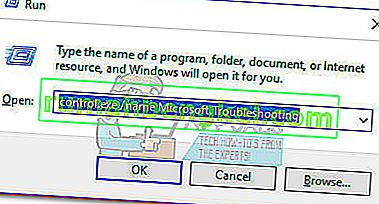
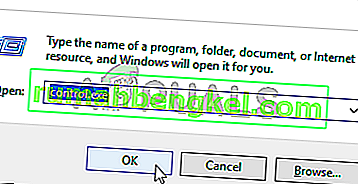
- 押しのWindowsキー+ Rファイル名を指定して実行ウィンドウを開きます。以下を入力または貼り付けます。
control.exe / name Microsoft。トラブルシューティング
ヒットは入力内蔵のトラブルシューティングを開くこと。
- でトラブルシューティングのウィンドウで、をクリックしてWindows Updateのその後をクリックし、ファイル名を指定して実行トラブルシューティングを。
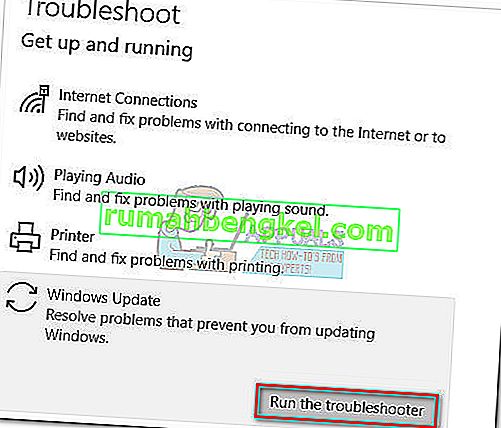
- トラブルシューティングツールがアップデートクライアントの問題を検出するまで待ちます。それがなんらかの問題を識別できた場合は、画面の指示に従って自動修復をトリガーします。通常、この修正を適用することを選択する必要があります。
- 場合はアップデートのトラブルシューティングには、それが修理何に管理することを報告し、コンピュータを再起動し、問題が次回起動時に解決されるかどうかを確認します。


それでも更新が0x8024a105エラーで失敗する場合は、方法2に進みます。
方法2:ユーザーアカウント制御(UAC)設定を変更する
トラブルシューティングツールで問題を自動的に修正できなかった場合は、ユーザーアカウント制御の設定で問題が発生していないかどうかを確認します。結局のところ、ログインアカウントに必要な権限がないため、一部の更新は0x8024a105エラーで失敗していました。アカウントに関連するユーザーアカウントのアクセス許可を管理者に変更することで、この問題を簡単に解決できます。これを行うためのクイックガイドを次に示します。
- 押しのWindowsキー+ Rファイル名を指定して実行ウィンドウを開きます。「netplwiz」と入力するか貼り付けて、Enterキーを押し、組み込みのトラブルシューティングツールを開きます。
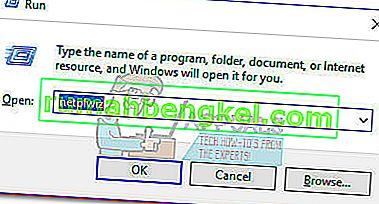
- でユーザータブで、使用していることをユーザーに選択して、をクリックしてくださいプロパティ。
- [ プロパティ]ウィンドウで、[ グループメンバーシップ]に移動し、管理者へのアクセスレベルを設定します。[ 適用]をクリックして変更を保存します。
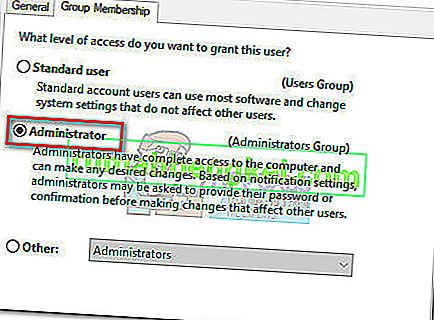 注:アクセスレベルが既にAdministratorに設定されている場合は、直接方法3に進みます。
 - コンピュータを再起動し、必ず同じユーザーアカウントでログインしてください。起動が完了したら、更新を再度実行してください。0x8024a105エラーで失敗する場合は、3番目の方法に進んでください。

 注:アクセスレベルが既にAdministratorに設定されている場合は、直接方法3に進みます。
方法3:Windows Updateコンポーネントを手動でリセットする
上記の方法が失敗した場合は、Windows Updatesコンポーネントを手動でリセットしてから、Windows Updateプロセスを再起動するしかありません。注目の4つの方法のうち、成功する可能性は高くなりますが、さらに調整が必要です。
以下は、Windows Updateコンポーネントをリセットするためのクイックガイドです。
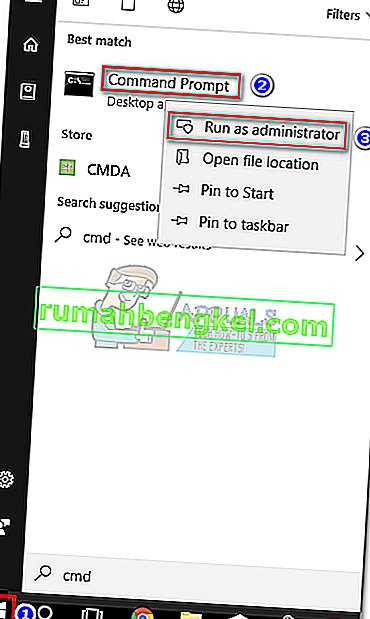
- Windowsのスタートバー(左下隅)をクリックし、「cmd」を検索します。次に、コマンドプロンプトを右クリックし、[ 管理者として実行 ]を選択します。
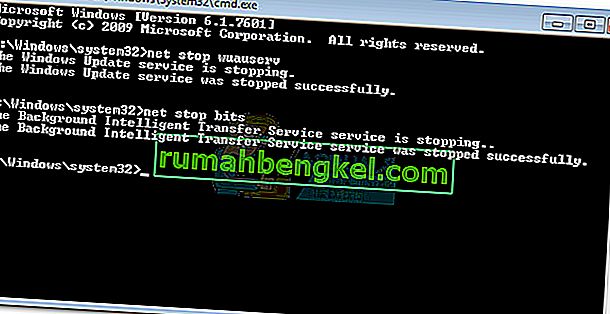
- 管理者特権のコマンドプロンプトでは、MSIインストーラー、Windows Update、BITS、および暗号化のサービスを停止します。これを行うには、次のコマンドを挿入し、それぞれの後にEnterキーを押します。
ネットストップwuauservネットストップcryptSvcネットストップビットネットストップmsiserver
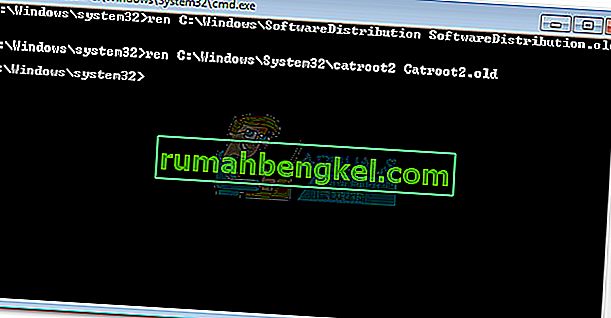
- すべてのサービスが停止したら、Windows Updateがコンポーネントを再起動するように、SoftwareDistributionフォルダーとCatroot2フォルダーの名前を変更しましょう。管理者特権のコマンドプロンプトに2つのコマンドを貼り付けるか入力し、それぞれの後にEnterキーを押します。
ren C:\ Windows \ SoftwareDistribution SoftwareDistribution.old
ren C:\ Windows \ System32 \ catroot2 Catroot2.old
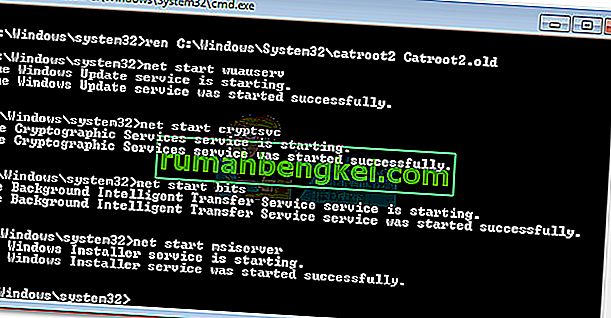
- 2つのフォルダーの名前を変更したら、MSIインストーラー、BITS、暗号化、およびWindows Updateのサービスを再起動します。これを行うには、コマンドプロンプトで次のコマンドを入力し、各コマンドの後にEnterキーを押します。
ネットスタートwuauservネットスタートcryptSvcネットスタートビットネットスタートmsiserver
- サービスが再起動したら、管理者特権のコマンドプロンプトを閉じ、コンピューターを再起動します。


方法4:ソフトウェア配布フォルダーを削除する
場合によっては、Powershellを使用してフォルダーを削除するだけで問題を解決できることがあります。したがって、この手順では、最初にPowerShellを管理者として実行し、次にソフトウェア配布フォルダーを削除して更新プロセスをキックスタートします。そのため:
- Press “Windows” + “X” buttons simultaneously and select the “Power Shell(Admin)” option.
- Type in the following command and press “Enter” to execute it.
net stop wuauserv
- Again, type in the following command and press “Enter”.
net stop bits
- Lastly, navigate to the following folder.
C:\Windows\SoftwareDistribution
- Press “Ctrl” + “A” to select all the contents of the folder and press “Shift” + “Del” button to delete them permanently.
- Confirm any prompts that warn you about deleting these files and then reboot your computer to complete the process.
- Now, try to update and check to see if the issue persists.

Once your computer boots back up, see whether you are able to install the updates without the 0x8024a105 error. If you do, try to perform an SFC scan to fix any issues with missing files or drivers.
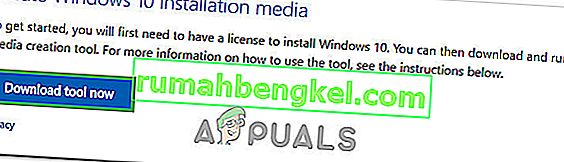
Method 5: Update Using Media Creation Tool
In some cases, you might be unable to update your computer using the default Windows Update process because your Windows might not be able to establish a proper connection with the Update servers. Therefore, in this step, we will be deploying the Windows Media Creation Tool to perform the update for us. It will automatically download and install the update files to upgrade our Windows. For that:
- Download the Windows Media Creation Tool from here.
- Run the executable and follow with the on-screen instructions for the initial setup.
- After the initial setup, select the “Upgrade this PC” option and click on “Next”.
- Accept the License terms and let the installer run.
- The tool will now automatically grab the update files from the servers and update your computer to the latest version available.
- Check to see if doing so has fixed the error.

Method 6: Delete Download Folders
When a new update is downloaded, it is generally stored in some folders on the computer. In this step, we will be deleting some of these folders and which will prompt the operating system to go ahead and download new files which can sometimes clear out the error and the update will be applied normally. For that:
- Press “Windows” + “R” to open the Run prompt.
- Type in “Control Panel” and press “Enter” to launch the classical control panel interface.
- In the Control Panel, click on the “View By:” option and select “Large Icons” from the list.
- Click on the “File Explorer Options” and a new window should pop up.
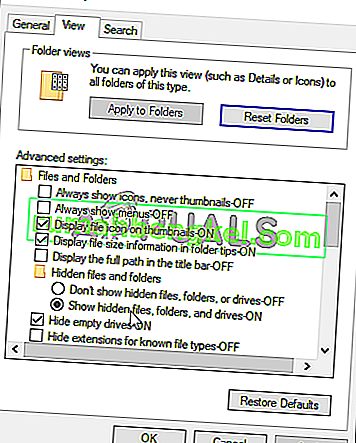
- In the File Explorer Options, click on the “View” button and then double click on the “Files and Folders” button to expand it.
- After that, double click on the ‘Hidden Files and Folders” to expand it as well.
- Check the “Show hidden Files, Folders and Drives” option and click on “Apply” to save your changes.
- Click on “OK” to close out of the window and press “Windows’ + “E” to launch the file explorer.
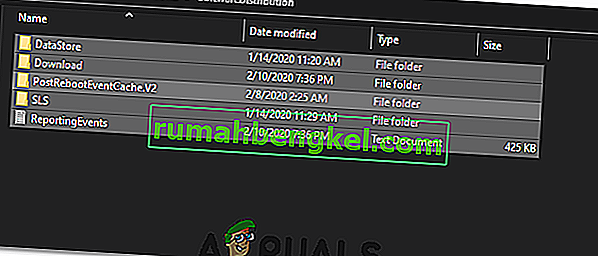
- In the File Explorer, delete the “$Windows.~WS” and “$Windows. ~BT” folders.
- Make sure to clear out the recycle bin as well so that they cannot be recovered.
- After this, press “Windows’ + “I” to launch settings and click on the “Update and Security” option.
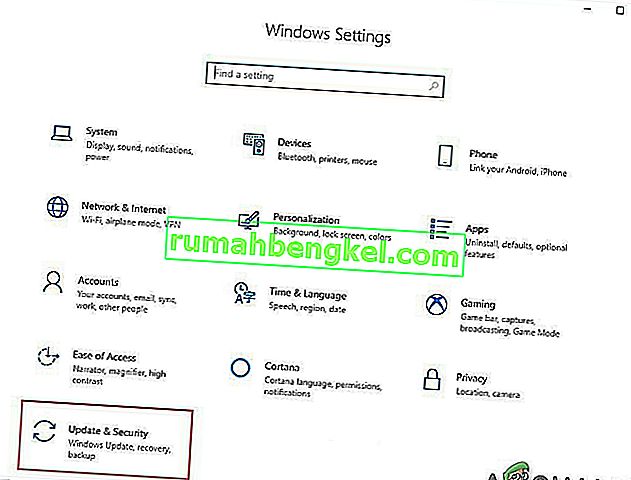
- In Update and Security, click on the “Windows Update” option on the left pane and then click on the “Check for Updates” button.
- Updates will now automatically be downloaded and installed.
- Check to see if the issue persists.


Method 7: Resetting Catroot2 Folder
In some cases, it is possible that the Catroot2 folder and its files have either been corrupted or they have been misconfigured due to which this issue is being triggered. Therefore, in this step, we will first be making some changes from the command prompt and then we will delete the files inside that folder. For that:
- Press “Windows’ + “R” to launch the run prompt.
- Type in “cmd” and then press “Shift” + “Ctrl” + “Enter” to provide administrative privileges.
- Type in the following command and press “Enter” to execute it.
net stop cryptsvc
- After you have stopped the cryptsvc using the command above, type in the following commands into the command prompt one by one and press “Enter” after each to execute them on your computer.
md %systemroot%system32catroot2.old xcopy %systemroot%system32catroot2 %systemroot%system32catroot2.old /s
- After executing the commands stated above, we will be deleting all the files from the catroot folder without deleting the folder itself.
- Press “Windows’ + “R” to open the Run prompt and type in the following address to navigate to the catroot folder.
C:/Windows/System32/catroot2
- Press “Ctrl” + “A” once inside the folder to select all items inside it and press “Shift” + “Delete” to remove them from your computer.
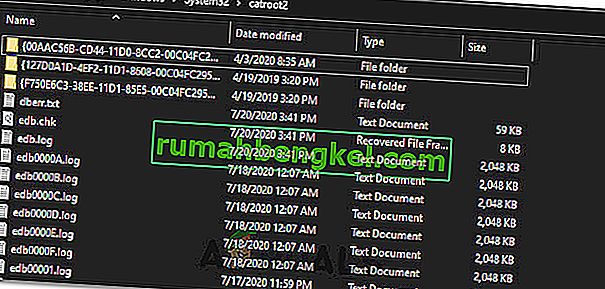
- After removing these, confirm any prompts that might spring up on your screen.
- After that, open the command prompt back up and execute the following command.
net start cryptsvc
- Try to update your computer and check to see if the issue still persists.


Method 8: Configuring Services to Start Automatically
Sometimes, your computer might be preventing certain services from starting and functioning in the background due to which the update might not be properly installed or configured to be applied on your computer. Therefore, in this step, we will be setting up some services to startup automatically. For that:
- Press “Windows’ + “R” to launch the Run prompt.
- Type in “cmd” and press “Ctrl” + “Shift” + “Enter” to provide admin permissions.

- Type in the following commands one by one in the command prompt and press “Enter” after each to execute them.
SC Config wuauserv start=auto SC Config bits start=auto SC Config cryptsvc start=auto SC Config trustedinstaller start=auto
- This way, we will have configured these services to startup and run automatically in the background.
- Check to see if the issue persists.

Method 9: Re-register Windows Update and BITS Files
It is possible that some windows update files and Bits files might not be properly registered on your computer. Therefore, in this step, we will be re-registering these files on the computer and then we will check to see if that fixes our issue. For that:
- Press “Windows’ + “R’ to open the Run prompt.
- Type in “cmd” and then press the “Ctrl” + “Shift” + “Enter” buttons to provide admin permissions.
Type in the following commands one by one and press “Enter” after each to register the components.regsvr32.exe atl.dll regsvr32.exe urlmon.dll regsvr32.exe mshtml.dll regsvr32.exe shdocvw.dll regsvr32.exe browseui.dll regsvr32.exe jscript.dll regsvr32.exe vbscript.dll regsvr32.exe scrrun.dll regsvr32.exe msxml.dll regsvr32.exe msxml3.dll regsvr32.exe msxml6.dll regsvr32.exe actxprxy.dll regsvr32.exe softpub.dll regsvr32.exe wintrust.dll regsvr32.exe dssenh.dll regsvr32.exe rsaenh.dll regsvr32.exe gpkcsp.dll regsvr32.exe sccbase.dll regsvr32.exe slbcsp.dll regsvr32.exe cryptdlg.dll regsvr32.exe oleaut32.dll regsvr32.exe ole32.dll regsvr32.exe shell32.dll regsvr32.exe initpki.dll regsvr32.exe wuapi.dll regsvr32.exe wuaueng.dll regsvr32.exe wuaueng1.dll regsvr32.exe wucltui.dll regsvr32.exe wups.dll regsvr32.exe wups2.dll regsvr32.exe wuweb.dll regsvr32.exe qmgr.dll regsvr32.exe qmgrprxy.dll regsvr32.exe wucltux.dll regsvr32.exe muweb.dll regsvr32.exe wuwebv.dll
- After executing the commands listed above, check to see if the issue still persists.

Note: After trying the following fixes, if the issue still persists, try to perform a clean boot and check if that fixes it. If it does, update in the clean boot and then get out of it after the update is completed. If that doesn’t work, try to go for a clean install of Windows.