「安全な接続を確立しています」とは、ウェブサイトにアクセスしようとしたときに、Google Chromeブラウザーウィンドウの左下に表示されるメッセージです。HTTPSプロトコルを使用するWebサイトにアクセスすると表示されます。このようなWebサイトにアクセスすると、安全で暗号化された接続を確立する必要があります。

ただし、Google Chromeユーザーは、特にEdgeまたはFirefoxブラウザーと比較すると、この接続がすべてのWebサイトで確立するには時間がかかりすぎると主張しています。この問題を正常に解決するために使用される方法はいくつかありますが、この記事ではそれらをリストすることにしました。以下をチェックしてください!
Google Chromeで安全な接続の確立に時間がかかる問題の原因は何ですか?
この問題にはさまざまな原因があり、以下のリストを確認して、シナリオの正しい原因を正確に特定する必要があります。これにより、使用できるトラブルシューティング方法が絞り込まれます。以下をチェックしてください!
- 暗号化サービスが誤動作しています –このサービスは、クライアントとサーバー間の安全な接続を確立するために使用されるTLSハンドシェイクの解決を担当します。このサービスを再起動すると、問題が解決するはずです。
- 疑わしいアドオン – Chromeブラウザに新しい拡張機能やプラグインを追加した場合、そのうちの1つが接続の問題を引き起こし、安全な接続を確立するために必要な時間を延長する可能性があります。Google Chromeから削除することを検討してください。
- ウイルス対策チェック –ほとんどのウイルス対策スイートには、確立しようとしている接続をスキャンするHTTPスキャン機能が備わっています。接続に必要な時間が長くなるため、高速化のために無効にすることを検討する必要があります。
- TLS 1.3 – Google ChromeブラウザでTLS 1.3を使用している場合、特定のWebサイトは互換性がない可能性があるため、当面は無効にすることを検討してください。
解決策1:次のコマンドセットを使用する
この方法はその単純さで非常に人気があり、多くの人がこの方法を使用して、目前の問題に関連するほとんどのことを修正します。面白いのは、それが機能し、ユーザーがこれが問題を解決するために取った唯一のステップであるとコメントしていることです。Fix:Err_Connection_Closedの記事からSolution 2をチェックして、今すぐ試してください。コマンドプロンプトのコマンドを使用して、最初の手順のみを実行するようにしてください。
Google Chromeを開いて、「安全な接続を確立しています」というメッセージが長時間ハングするかどうかを確認してください。
解決策2:ネットワークリセットを実行する
ネットワークリセットの実行は、この問題を解決するもう1つの簡単な方法です。これは多くのユーザーに効果があり、試してみてもまったく何も使用できません。以下の手順に従って、Google Chromeでウェブサイトにアクセスしたときに、「安全な接続を確立しています」というメッセージが消えるまでに時間がかかりすぎるかどうかを確認してください。
- キーボードのWindowsキー+ Rキーの組み合わせを使用して実行ユーティリティを開きます(これらのキーを同時に押します。新しく開いたボックスに引用符なしで「ms-settings:」と入力し、[OK]をクリックして設定ツールを開きます。
- 別の方法は、スタートメニューをクリックし、左下の歯車アイコンをクリックして、PCで設定ツールを開くことです。

- また、Windowsキー+ Iキーの組み合わせを使用しても同じ効果が得られます。クリックして[ ネットワークとインターネット]セクションを開き、ウィンドウの左側にある[ ステータス ]タブのままにします。
- 青いネットワークリセットボタンが表示されるまで下にスクロールします。それをクリックして、画面に表示される指示に従い、すべてに準拠していることを確認してください。
- 同じ問題が続くかどうか確認してください!


解決策3:サービスで暗号化サービスとDNSクライアントを再起動する
ファイル共有は、Windows 10の他の機能と同様に、適切に実行するために特定のサービスに依存しています。この場合、サービスはFunction Discovery Provider HostおよびFunction Discovery Resource Publicationと呼ばれます。これらのサービスを開始し、継続的に実行する必要があります。お使いのコンピュータでそれを実現するには、以下の手順に従ってください!
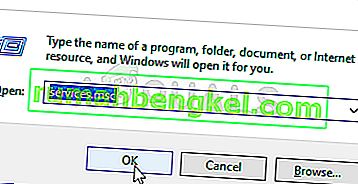
- キーボードのWindowsキー+ Rキーの組み合わせを使用して実行ユーティリティを開きます(これらのキーを同時に押します。新しく開いたボックスに引用符なしで「services.msc」と入力し、[OK]をクリックしてサービスツールを開きます。
- 別の方法は、スタートメニューにあるコントロールパネルを見つけて開く方法です。スタートメニューの検索ボタンを使用して検索することもできます。
- コントロールパネルウィンドウが開いたら、ウィンドウの右上にある[ 表示 ]オプションを[ 大きいアイコン]に変更し、[ 管理ツール]エントリが見つかるまで下にスクロールします。それをクリックして、下部にあるサービスのショートカットを見つけます。クリックして開くこともできます。
- リストから暗号化サービスとDNSクライアントサービスを見つけ、それぞれを右クリックして、表示されるコンテキストメニューから[ プロパティ ]を選択します。
- サービスが開始されている場合(サービスステータスメッセージのすぐ隣にあることを確認できます)、ウィンドウの中央にある[ 停止 ]ボタンをクリックして、サービスを停止する必要があります。停止している場合は、続行するまで停止したままにします。
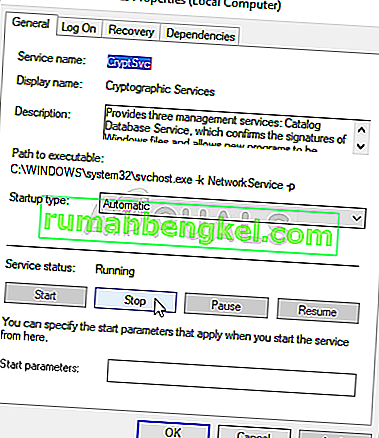
- 他の手順に進む前に、サービスのプロパティウィンドウの[ スタートアップの種類 ]メニューのオプションが[ 自動]に設定されていることを確認してください。スタートアップの種類を変更するときに表示されるダイアログボックスを確認します。終了する前に、ウィンドウの中央にある[スタート ]ボタンをクリックします。私たちが言及したすべてのサービスに対して同じプロセスを繰り返すことを確認してください。


[スタート]をクリックすると、次のエラーメッセージが表示される場合があります。
Windowsはローカルコンピュータでサービスを開始できませんでした。エラー1079:このサービスに指定されたアカウントは、同じプロセスで実行されている他のサービスに指定されたアカウントと異なります。
この場合は、以下の手順に従って修正してください。
- 上記の手順の1〜3に従って、サービスのプロパティウィンドウを開きます。移動へのログオンのタブとをクリックして[参照... ]ボタンをクリックします。
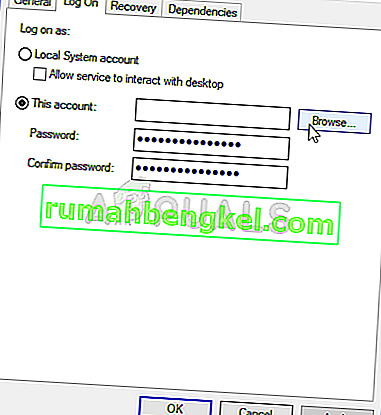
- [選択するオブジェクト名を入力してください]入力ボックスの下に、「ネットワークサービス」と入力し、[ 名前の確認 ]をクリックして、名前が使用可能になるまで待ちます。
- 完了したら[ OK]をクリックし、パスワードを設定した場合は、プロンプトが表示されたら[ パスワード]ボックスにパスワードを入力します。Windows 10のファイル共有が正しく機能するようになりました。

解決策4:疑わしい拡張機能を確認する
問題が最近発生し始めた場合は、新しく追加された拡張機能がセキュリティコンサートを引き起こしていることが原因である可能性があります。これは、Google Chromeを開き、拡張機能を1つずつ無効にし、どの拡張機能が原因であるかを確認することで簡単に確認できます。後で削除してください!
- デスクトップからアイコンをダブルクリックするか、[スタート]メニューでアイコンを検索して、Google Chromeを開きます。拡張機能を開くには、アドレスバーに以下のアドレスを入力してください。
chrome:// extensions
- Try to locate the extension which could cause security issues or an extension which was added recently and click the Remove button next to it to remove it from Google Chrome permanently.

- Restart Google Chrome and check to see if you still notice that the “Establishing secure connection” message hangs for too long on your computer!

Solution 5: Disable HTTP/Port Checking on Your Antivirus
The usual cause for the problem is your antivirus unnecessarily scanning the sites’ certificates which slows down the process of requesting files from the servers which, in effect, can cause the “Establishing a secure connection” message to hang for a long time in Google Chrome.
エラーはさまざまなウイルス対策ツールを使用しているユーザーに表示されるため、最も一般的なサードパーティ製AVツールの一部でHTTPまたはポートスキャンオプションを見つける方法を次に示します。
- システムトレイのアイコン(ウィンドウの下部にあるタスクバーの右側の部分)をダブルクリックするか、[スタート]メニューで検索して、ウイルス対策ユーザーインターフェイスを開きます。
- HTTPSスキャン設定が異なるウイルス対策ツールに関するさまざまなスポットに位置しています。多くの場合、手間をかけずに簡単に見つけることができますが、最も人気のあるウイルス対策ツールで簡単に見つける方法を以下に示します。
カスペルスキーインターネットセキュリティ:ホーム>>設定>>追加>>ネットワーク>>暗号化された接続のスキャン>>暗号化された接続をスキャンしない

AVG: Home >> Settings >> Components >> Online Shield >> Enable HTTPS Scanning (uncheck it)

Avast: Home >> Settings >> Components >> Web Shield >> Enable HTTPS Scanning (uncheck it)
ESET: Home >> Tools >> Advanced Setup >> Web and Email >> Enable SSL/TLS protocol filtering (turn it off)
Check to see if you are now able to visit any website without receiving the “Establishing a secure connection” message for a long time! If the error still appears, you might consider using a different antivirus or firewall tool, especially if the one giving you the problems is free!
Solution 6: Disable TLS 1.3
The problem is mostly related to some of the latest version of TLS. Certain developers have discovered that the problem can be resolved easily simply by editing certain advanced Chrome settings which will disable TLS 1.3. TLS is the transport layer protocol which handles encryption and data transfer. Try using an older version. Follow the instructions below to try this method out!
- Open Google Chrome by double-clicking its icon from the Desktop or by searching for it in the Start menu. Type in the address below in the address bar to open Experiments:
chrome://flags
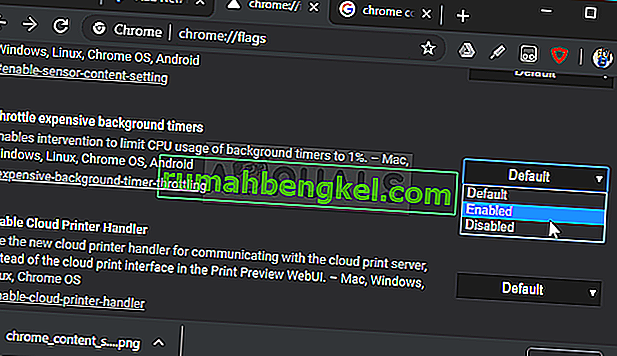
- Locate the option to disable TLS listed below inside the Experiments window, under the Available tab. You can use the search bar at the top of the window to locate it as the list is very long. Make sure you search for TLS, find the related settings, and set it to Disabled.
- Restart Google Chrome and check to see if establishing the connection is still a problem!

Solution 7: Make Sure Certain Settings are Set in Internet Options
This is one of the easiest methods used to resolve the problem. Proxy servers can cause the login process to fail and you need to disable them inside Internet Options. Make sure you try out the methods above before troubleshooting this problem!
- Open Internet Explorer on your computer by searching for it on the Desktop or the Start menu. Click on the cog icon located in the top right corner. From the menu which opens, click on Internet Options to open a list on related connection settings.

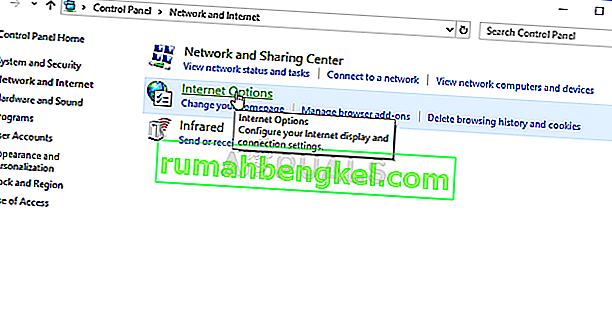
- If you don’t have access to Internet Explorer, Open Control Panel by searching for it in the Start menu or by using the Windows Key + R key combination, typing “control.exe” in the Run box, and click OK to run Control Panel.
- In Control Panel, select to View as: Category at the top right corner and click on the Network and Internet button to open this section. Inside this window, click on Internet Options to navigate to the same screen as you would if you opened Internet Explorer.
- Navigate to the Connections tab and click on LAN Settings. Uncheck the box next to Automatically Detect Settings and make sure the Use a proxy server for your LAN option is unchecked.
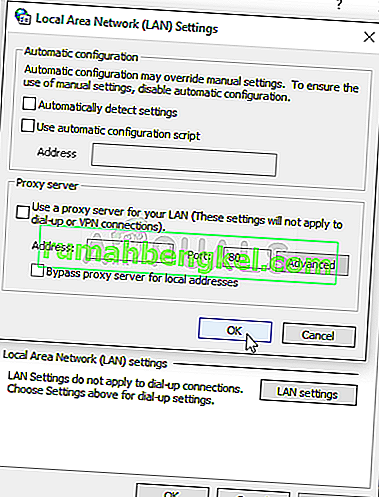
- Make sure you apply the changes you made and restart your computer before you check to see if the Origin won’t go online login error still appears.


Solution 8: Clear Browsing Data
An over-accumulation of browsing data in the form of cookies, browser cache, and history files can slow down a browser’s ability to connect and cause it to use more internet resources than necessary. This can be observed when trying to connect to a secure website. Users have reported that deleting their browsing data was able to help them get rid of the problem!
Make sure you follow the steps from the Solution 3 of our How to Fix Google Chrome High CPU Usage on Windows? article. Restart your computer again and check if the “Establishing secure connection” message keeps appearing!
Solution 9: Group Policy Fix
This is quite an easy way of resolving the problem but, unfortunately, it’s not available to Windows 10 Home users. If you are using Windows 10 Pro or Enterprise, make sure you follow the steps below to try to resolve this problem!
- Use the Windows Key + R key combination (tap the keys simultaneously) to open the Run dialog box. Enter “gpedit.msc” in the Run dialog box, and press the OK button to open the Local Group Policy Editor tool. On Windows 10, you can try simply type Group Policy Editor in the Start menu and click the top result.

- On the left navigation pane of Local Group Policy Editor, under Computer Configuration, double click on Windows Settings, and navigate to Security Settings >> Public Key Policies.
- Select the Public Key Policies folder by left-clicking on it and check out its right side section.
- Double click on the “Certificate Path Validation Settings” policy and check the radio button next to the “Define Policy Settings” option. Uncheck the box next to the Allow user trusted root CAs to be used to validate certificates (recommended) option.
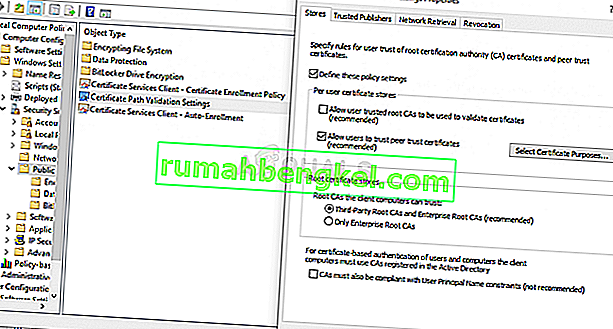
- Apply the changes you have made before exiting. The changes won’t be applied until you restart.
- Finally, reboot the computer to save the changes and check to see if you are still being targeted with the error.